


1. Check Your Boxes!
Before diving in, make sure both boxes arrived safely. Check for any signs of damage. If everything looks good, you’re all set! If not, reach out to our customer support, and we’ll help sort it out.
2. Set Up Your Workspace
Choose a soft surface like a blanket, carpet, or the cardboard from the box to protect your furniture while assembling. We recommend grabbing a friend to help – Bas is a bit bulky, and two pairs of hands make things easier and safer.
If you encounter any problems, we are here to help, so please reach out to us!
Step 1: Check Your Parts
Make sure you’ve got everything:
1x Allen key
10x screws
8x shelf plugs
9x wooden dowels
4x wooden legs
1x top panel (A)
1x bottom panel (B)
1x back panel (C)
1x outer side panel (D)
1x outer side panel (E)
1x middle divider (F)
2x shelves (G)
1x sliding front panel (H)
3x drawers (I)


Step 2: Attach the middle divider
Lay the back panel (C) flat — it’s the largest one. Identify the top (you’ll spot the black brackets).
Attach the middle divider (F) using 3 connection points as shown in the animation.
⚠ Make sure the drawer slides on (F) are on the correct (right) side and properly oriented.


Step 3: Attach the right side panel
Repeat the same logic as in Step 2. Connect the right outer panel (E) to the middle divider.
Again, double-check the orientation of the drawer slides and top vs. bottom. Tighten in 3 places.


Step 4: Attach the left side panel
Now attach the left panel (D) to the structure, tightening in 3 places.


Step 5: Insert wooden dowels
Grab your 9 wooden dowels and insert them into the designated holes on the frame.

Step 6: Flip the unit (carefully)
Time to lift! Flip the sideboard so the bottom (with dowels) is facing up.
💡 Hint: Have someone help you — it’s safer for both you and the sideboard.

Step 7: Attach the bottom panel
Fit the bottom panel (B) onto the dowels. Make sure each dowel fits snugly into place.
Secure with 10 screws in the marked areas.

Step 8: Screw in the legs
Take the 4 wooden legs and screw them into the pre-threaded holes — no tools needed.

Step 9: Flip it upright
Carefully lift and flip the sideboard onto its legs.
💡 Hint: Get a helping hand again to avoid damage or injury.

Step 10: Attach the top panel
Place the top panel (A) on top of the structure and tighten in all 10 holes.


Step 11: (Optional) Prep for drawers
To make installing drawers easier, you can lay the sideboard gently on its back.
💡 Remember: Always lift with help.

Step 12: Install the drawers
Slide in the 3 drawers (I) along the rails.
You’ll hear a “click” when each one locks into place properly.
Adjust drawers using the knobs inside to ensure smooth operation and perfect alignment.


Step 13: Back upright
If it’s still on its back, now’s the time to return it to standing position.

Step 14: Add shelf plugs
Insert 4 shelf plugs per side. There’s no need to screw them in — just pop them into the height you prefer. You can move them anytime.

Step 15: Place the shelves
Slide the shelves (G) onto the plugs.
💡 Tilt slightly during placement to avoid scratching the interior sides.

Step 16: Install the sliding front panel
Here comes the fun part — adding the front!
Ensure the hinges are aligned: the yellow-marked ones with circles go at the bottom.
To install:
- Hold the top hinges and release the latches downward
- First, slide the bottom hinges into the track
- Then, align the top hinges and release the latches to lock into place.


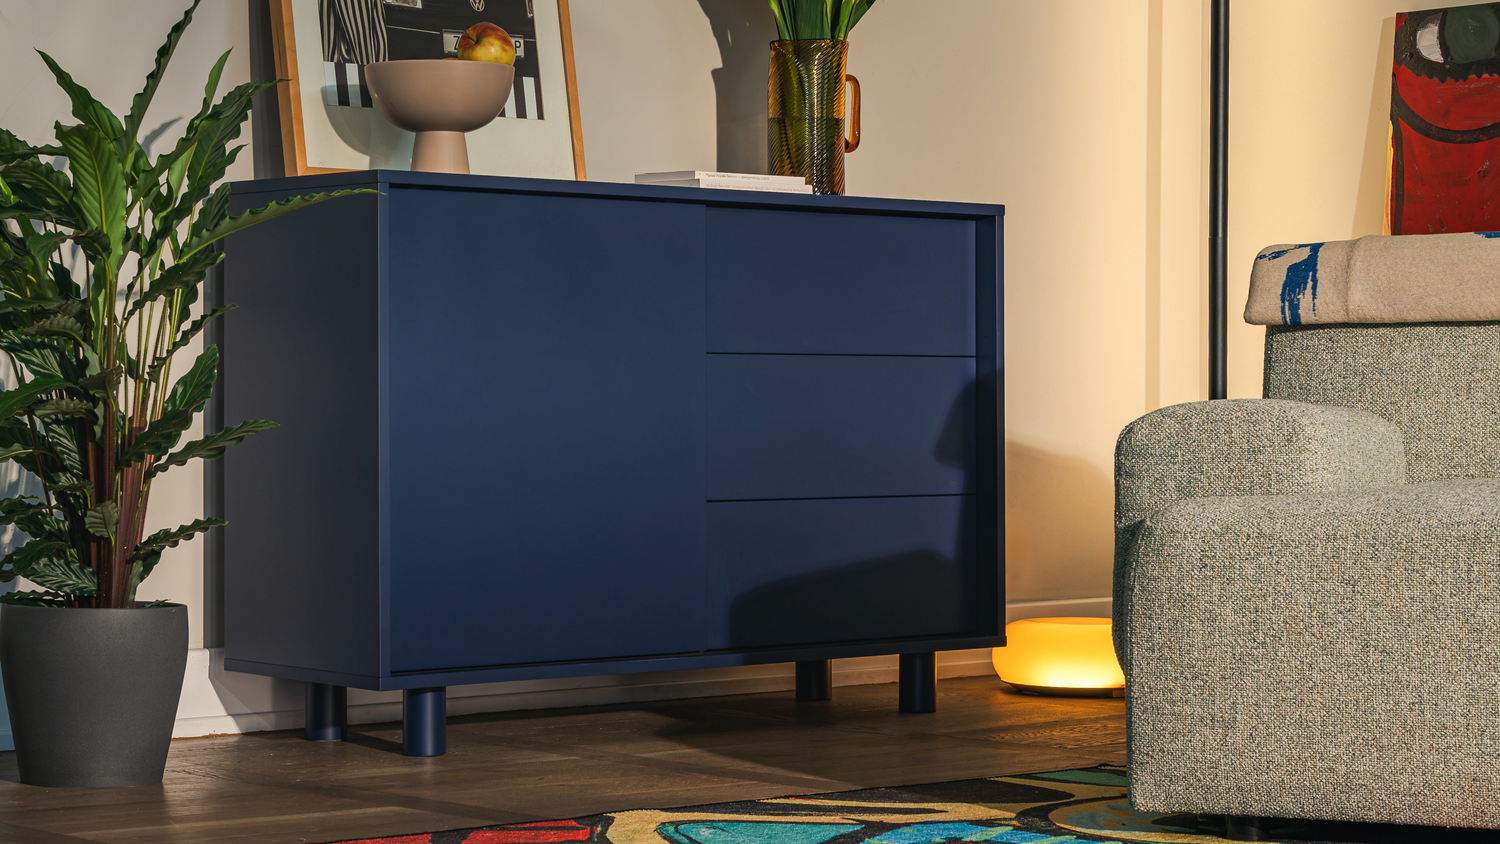
Step 17: Done and Dusted!
Voila! Your Pac Sideboard is ready to shine.
If anything feels loose, tighten up.
Don’t forget to level the legs for perfect balance.
Enjoy your new piece — we hope it feels just as good as it looks!
If anything was unclear, incorrect, or poorly explained, we would greatly appreciate your feedback.
Now double-check and share with us your work.
Once you have completed assembling, double-check your work to ensure that everything is in place and secure. If everything is save and sound we would love to see the furniture in your unique spaces.
Leave a comment
All comments are moderated before being published.
This site is protected by hCaptcha and the hCaptcha Privacy Policy and Terms of Service apply.